
Welcome to my easy sourdough bread recipe (and your newest obsession)! If you are thinking about jumping on the sourdough bandwagon, I am here to tell you that it is never to late!
If you aren’t ready to jump into make Sourdough, try out or Easy, Dutch Oven Artisan Bread!
Benefits of Sourdough Bread
- because of the fermentation process, it is easier for your body to digest
- does not cause blood sugars to spike
- the fermentation process increases the availability of magnesium, folate and potassium
- more antioxidants than other breads
- contains lots of gut healthy prebiotics and probiotics
- makes you feel fuller longer
- amazing flavour
- simple ingredients

How do you know if your sourdough starter is ready to use?
After you feed your starter it will begin to bubble and grow over the next couple hours. This time will depend on how active your starter is, temperature and how much you feed it. Once it doubles in size and is bubbly, it should be ready!
If you aren’t convinced, add a tablespoon sized dollop to some water. If it floats, then your starter is ready!
How do you stretch and fold your sourdough?
The stretch and fold process is very important in developing and strengthening the gluten in your sourdough bread. This process helps give it the unique bubbly look and chewy texture.
Here is a great video to show the ‘stretch and fold’ technique in making your sourdough.
When you are doing the ‘stretch and fold’ technique, make sure NOT to tear your dough. Tearing your dough make cause your bread it to become dense and tough.
Make sure to stretch and fold your dough a total of 4 times in approximately 2 hours. Each time you do it, you will noticed your dough will come together and get less sticky.
Covering and Placing in the Fridge
I do this to allow me some flexibility on when I need to bake my sourdough. The bulk fermentation process happens while it is sitting in the fridge. But it will slow down a bit which can keep it from falling flat if you don’t get to bake it in time.
As a mom of 4 kids, I need as much flexibility in my schedule as I can.
Warming Up Your Dutch Oven to Bake Your Sourdough Bread
Your Dutch Oven is made up a cast iron and may or may not be ceramic coated. it will take a while to get hot. So I like to place my Dutch Oven inside my oven when I begin to preheat it. And I place my cold dough, directly into my hot Dutch Oven when I am ready to bake it.
Scoring Your Dough
Scoring your sourdough is not just to make it look pretty. It actually is a vital step in ensuring your dough will expend properly while baking. When scoring, make sure you cut just deep enough to see the bubbles in your dough.
Shaping Your Sourdough
The shaping process is similar to the stretch and fold but more gentle and upside down. Your want to stretch and fold ends to be on the bottom time of your loaf. You will continue to stretch and fold your dough under itself until the top is taught and bounce back when you press down on it.
Enjoying Your Sourdough Bread
Before you cut into your beautiful new loaf, make sure you allow it to cool. We love to eat our sourdough bread with butter or homemade jam. But it pairs will with just about anything!
Can you bake sourdough bread without a Dutch Oven?
Yes! The Dutch Oven is nice because it steams the bread while it bakes.
But if you don’t have a Dutch Oven, you can place a baking pan or muffin tin full of water near the bottom of your oven. I would place it in there during the preheating step. This will create steam in your oven. Top of the pan with water when you are ready to bake (the pan will stay in the oven during the entire baking process).
Then I would place your sourdough onto parchment paper and into the baking pan your have. This could be a standard loaf pan, pie plate or even a cookie sheet.
Your shape will differ, and the crust may be a bit crunchier or chewier. But the flavor will still be what your are looking for!
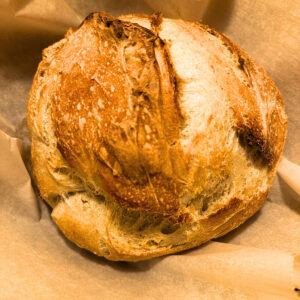
Easy Sourdough Bread
Ingredients
- 375 grams warm water
- 100 grams bubbly, active sourdough starter
- 500 grams all purpose flour
- 11 grams salt
Instructions
- Mix all ingredients until combined. Dough should be shaggy and sticky.
- Stretch and fold your dough every 30 minutes for a total of four times.
- Cover and place dough in fridge for approximately 12 hours minimum.
- Preheat over to 450℉. Place Dutch oven into the oven for 45 minutes.
- Remove dough from fridge.
- Do a final stretch and fold. Place onto a sheet of parchment paper and score.
- Once your Dutch oven is hot, remove from oven. Place parchment paper and formed dough carefully into the Dutch oven. Put on the lid of your Dutch oven. Return it to the oven.
- Bake for 45 minutes with the lid on. Then bake for the final 15 minutes with the lid removed.
- Remove loaf and allow to cool before cutting into it.
Leave a Reply